Tayberry Jam Recipe | Sweet & Tangy Homemade Spread
Craving a taste of summer? My homemade Tayberry Jam recipe is the perfect way to capture the sweet-tart flavor of these unique berries. Tayberries are a delightful cross between raspberries and blackberries, bringing the best of both worlds into one juicy bite.
When turned into jam, they create a rich, ruby-red preserve that’s perfect on toast, scones, or even swirled into yogurt. With just a few simple ingredients, you can make this luscious jam right in your own kitchen.
Jam Preparation
Making tayberry jam is surprisingly easy, but the secret lies in patience and preparation. I like to think of it as letting the berries and sugar “get to know each other” before cooking.
Preparing the Fruit
- Wash and Dry the Tayberries: Start by rinsing the Tayberries gently under cold water. Pat them dry with a clean kitchen towel to avoid extra water in the jam, which can affect the setting process.
- Combine with Sugar: In a large heavy-bottomed pot, mix the tayberries with the sugar. Stir well so every berry is coated. This helps draw out the natural juices and kickstarts the jam-making process.
- Let It Rest: Leave the mixture to sit for about 1 hour. During this time, the sugar dissolves into the berries, creating a natural syrup. This step enhances the jam’s flavor and reduces cooking time.
Cooking the Tayberry Jam
Boiling and Simmering
- Heat the Berry Mixture: Place the pot on medium heat and stir occasionally until the sugar fully dissolves and the berries start releasing their juices.
- Bring to a Boil: Increase the heat and bring the mixture to a rolling boil. Skim off any foam that rises to the surface; this helps your jam stay transparent and glossy.
- Check the Set: Simmer the jam for 2–5 minutes, then test for setting. You can do this by placing a small spoonful on a chilled plate. If it wrinkles slightly when pushed with your finger, the jam is ready.
- Add Lemon Juice (Optional): If you’d like a firmer set and a little tang, stir in the lemon juice just before the jam reaches its final boil.
Canning the Tayberry Jam
Once your jam has reached the perfect Set, it’s time to preserve it so you can enjoy summer flavors all year round.
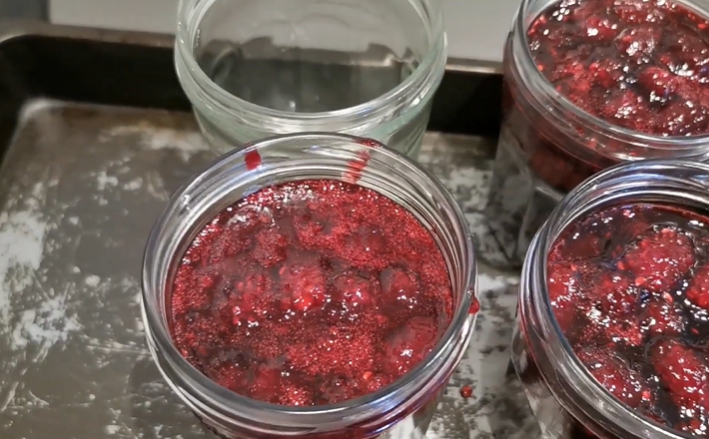
Filling the Jars
- Sterilize the Jars: Make sure your jars and lids are freshly sterilized. I usually run mine through boiling water or a hot dishwasher cycle right before use.
- Pour the Jam: Using a ladle and funnel, carefully pour the hot jam into the warm jars. Leave about ¼ inch (0.5 cm) of headspace at the top to allow for sealing.
- Seal Tightly: Wipe any drips from the rims with a clean cloth, then screw on the lids until finger-tight.
Water Bath Method for Long Storage
For safe preservation:
- Place the filled jars into a large pot of boiling water.
- Make sure the water covers the jars by at least 1 inch.
- Boil for 10 minutes.
- Remove the jars with canning tongs and let them cool completely.
Once cooled, press the center of each lid. If it doesn’t pop back, the jar is sealed correctly.
Storage Instructions
- Room Temperature: Properly sealed jars can be stored in a cool, dark place for up to 12 months.
- Refrigeration: Once opened, store in the fridge and use within 3–4 weeks.
- Freezing Option: You can also freeze tayberry jam in freezer-safe jars for up to 6 months.
Serving Suggestions
Tayberry jam isn’t just for spreading on toast. Here are some of my favorite ways to enjoy it:
- Swirled into Greek yogurt or oatmeal for a fruity kick.
- As a filling for sponge cakes, Victoria sponge, or Swiss rolls.
- Spooned over vanilla ice cream or cheesecake.
- Glazed onto roasted meats like pork or chicken for a sweet-savory twist.
Tips for the Perfect Tayberry Jam
- Choose Ripe Berries: The flavor of your jam depends on the quality of the fruit. Pick ripe, deep-colored tayberries for the sweetest results.
- Adjust Sugar Levels: If your berries are naturally lovely, use closer to 3½ cups of sugar. For a more traditional jam flavor and more extended storage, go with 4 cups.
- Foam Skimming Trick: Adding ½ teaspoon of butter during boiling helps reduce foam.
- Test Set Often: Overcooked jam can lose its fresh berry taste, so keep testing with the cold plate method.
- Clean Jars Matter: Always sterilize jars and lids properly. This ensures freshness and prevents spoilage.
Variations
Want to add a little twist? Try these ideas:
- Tayberry & Raspberry Jam: Mix equal parts tayberries and raspberries for a vibrant, slightly tangier jam.
- Tayberry & Apple Jam: Apples add natural pectin, helping the jam set beautifully without extra additives.
- Spiced Tayberry Jam: Add a cinnamon stick or a pinch of ground cloves during cooking for a cozy winter version.
- Low-Sugar Version: Use a low-sugar pectin mix if you want to reduce sugar while keeping the jam’s structure.
Tayberry Jam Recipe
Ingredients
Video
Notes
Required Kitchen Tools
When preparing Tayberry Jam, having the right tools at hand makes the process smooth and safe. Here’s what I always use:- Large Heavy-Bottomed Pot: Prevents the jam from burning and allows for even cooking.
- Wooden Spoon or Heatproof Spatula: Perfect for stirring the jam without scratching your pot.
- Sterilized Jars with Lids: Essential for storing your jam safely.
- Jar Funnel: Helps you pour hot jam neatly into jars without spills.
- Ladle: Makes transferring the jam much easier.
- Canning Tongs or Jar Lifter: Keeps your hands safe when handling hot jars.
Frequently Asked Questions (FAQs)
Can I use frozen tayberries for this jam recipe?
Yes, frozen tayberries work perfectly. Just thaw them slightly before mixing with sugar so they release their juices properly.
Do I need to add pectin to tayberry jam?
No, tayberries naturally contain pectin. However, adding a squeeze of lemon juice helps the jam set better and adds a subtle tang.
How do I know when the jam has set?
Use the cold plate test: place a small spoonful of jam on a chilled plate, let it cool for 30 seconds, then push it with your finger. If it wrinkles, your jam is ready.
Can I reduce the sugar in this recipe?
Yes, but sugar helps with preservation. If you want a lower-sugar jam, use 3½ cups of sugar and store the jam in the refrigerator once opened. For even less sugar, use a low-sugar pectin.
How long does homemade tayberry jam last?
Properly sealed jars last up to 12 months in a cool, dark pantry. Once opened, refrigerate and use within 3–4 weeks.
Can I double the recipe?
It’s best not to double in one pot; large batches don’t set evenly and may overcook. Instead, make two separate, smaller batches for better results.
What can I serve tayberry jam with?
Tayberry jam is delicious on buttered toast, fresh scones, and pancakes. It also makes a great cake filling, yogurt swirl, or even a glaze for meats like pork or chicken.
Conclusion
Making homemade Tayberry Jam is one of my favorites to savor summer’s bounty. The sweet-tart balance of tayberries creates a jam that’s versatile, delicious, and easy to prepare. Whether you enjoy it on fresh bread, use it in desserts, or gift it to loved ones, this jam is a true crowd-pleaser. With just berries, sugar, and a touch of lemon juice, you can fill your pantry with jars of ruby-red goodness.
So go ahead, grab those tayberries, warm up your jars, and let’s make some jam magic together!

Sally Mckenney is a dedicated baking enthusiast and dessert lover who creates and shares delicious cake recipes and practical baking tips on Daily Bake Lab. Her passion for sweet treats inspires home bakers to explore new flavors and enjoy the art of baking.