Olallieberry Jam Recipe | Sweet & Homemade Berry Spread
Craving a taste of something homemade and bursting with berry goodness? Dive into the world of Olallieberry Jam, a delightful preserve that highlights one of the Pacific Coast’s most beloved berries. These luscious, deep-purple berries are a cross between loganberries and youngberries, resulting in a unique blend of tartness and natural sweetness.
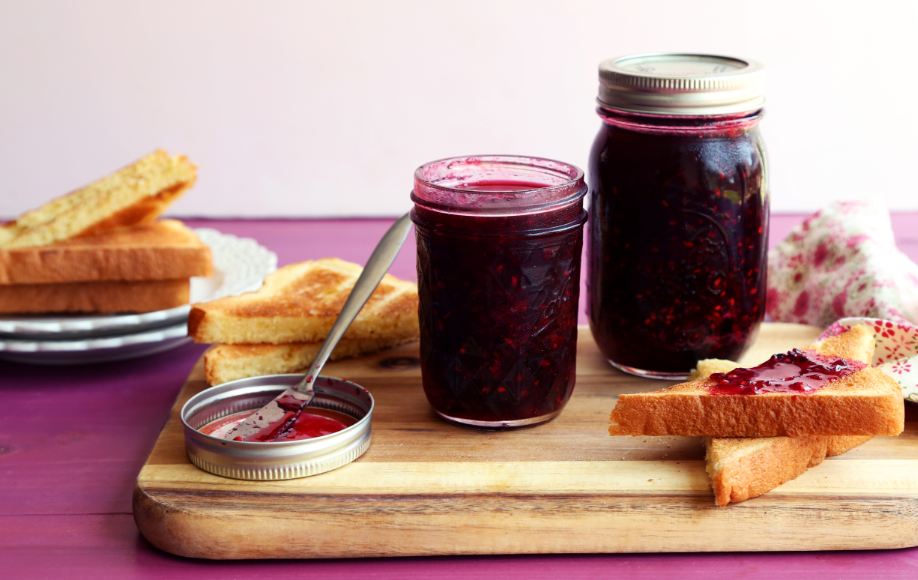
This easy recipe creates a jam with a glossy finish, rich color, and irresistible flavor. Whether you enjoy it on warm biscuits, swirl it into yogurt, or spread it over buttery croissants, Olallieberry Jam is a kitchen staple that feels both rustic and gourmet.
Jam Preparation
Making Olallieberry Jam is a simple yet rewarding process. Follow these steps carefully, and you’ll end up with perfectly set jam every time.
Mixing the Ingredients
To begin, I start by measuring my fresh, ripe olallieberries. I crush them gently in a large saucepan to release their natural juices. In a small bowl, I mix about ¼ cup of the sugar with the dry pectin; this helps the pectin dissolve evenly without clumping. Then, I add the sugar-pectin mixture and ½ teaspoon butter (the butter reduces foaming) into the berries.
I stir the mixture constantly over medium-high heat until it reaches a full rolling boil, which is when the bubbles don’t stop even while stirring. This step ensures the fruit and pectin combine properly for a smooth, glossy jam.
Adding the Sugar and Boiling
Once the mixture boils, I pour in the remaining sugar all at once. Stirring continuously, I bring it back to a full rolling boil. I let it boil hard for exactly 1 minute; this is the magic step where the jam sets. After the minute is up, I immediately remove the pan from the heat.
Filling the Jars
With the jam still hot, I carefully ladle it into sterilized glass jars using a canning funnel. I make sure to leave about ¼ inch of headspace at the top. Wiping the rims clean ensures a perfect seal when I place the lids on.
Processing the Jars
To preserve the jam safely, I process the jars in a boiling water canner for 10 minutes. This step not only seals the jars but also keeps the jam fresh and shelf-stable for months. Once processed, I let the jars cool completely before storing them in a cool, dark place.
Serving and Decoration
Delicious Ways to Enjoy Olallieberry Jam
One of the best parts of making homemade jam is enjoying it in countless ways. I love spreading my Olallieberry Jam on warm buttermilk biscuits or thick slices of sourdough toast. It also makes a beautiful topping for pancakes, waffles, or crepes.
If you enjoy baking, try swirling it into cheesecake batter before baking, or use it as a filling for thumbprint cookies and layer cakes. The tart-sweet flavor also pairs wonderfully with soft cheeses like brie or cream cheese, making it a perfect addition to a charcuterie board.
Creative Toppings and Pairings
To make your jam even more delightful, here are a few serving ideas:
- Dust with powdered sugar: When used as a filling in pastries.
- Pair with vanilla ice cream: Warm up a spoonful of jam and drizzle it over ice cream for a quick dessert.
- Glaze for meats: Believe it or not, Olallieberry Jam makes a fantastic glaze for roasted chicken or pork tenderloin.
- Gift jars: Tie a ribbon around a jar, add a handwritten label, and you’ve got the perfect homemade gift.
With its vibrant jewel-like color and burst of berry flavor, Olallieberry Jam is more than just a spread; it’s a versatile ingredient that elevates sweet and savory dishes alike.
Storage Instructions
How to Keep Olallieberry Jam Fresh
After processing, I let the jars cool completely at room temperature. Once cooled, I always check to ensure the lids have sealed properly, and there should be no flex when pressed in the center. Properly sealed jars can be stored in a cool, dark pantry for up to 12 months.
Once opened, I keep the jam in the refrigerator and make sure to use it within 2–3 weeks for the best flavor and freshness.
Freezing Olallieberry Jam
If you prefer, you can also freeze this jam. Spoon it into freezer-safe containers, leaving about ½ inch of headspace, seal tightly, and store in the freezer for up to 6 months. When you’re ready to enjoy, thaw the jam overnight in the fridge.
Olallieberry Jam Recipe
Ingredients
Video
Notes
Required Kitchen Tools
When making homemade Olallieberry Jam, the right tools make the process smooth and successful. Here are the essentials you’ll need:- Large Saucepan: For cooking the fruit mixture evenly.
- Wooden Spoon or Heatproof Spatula: To stir the berries and sugar without scratching cookware.
- Measuring Cups: Accuracy is key for jam-making.
- Jar Lifter and Canning Funnel: For safely filling jars with hot jam.
- Sterilized Glass Jars with Lids: Essential for proper preservation.
- Boiling Water Canner or Large Pot: To process the jars and seal the jam safely.
Frequently Asked Questions (FAQ)
What do olallieberries taste like?
Olallieberries have a flavor that’s a perfect balance of tartness and sweetness. They taste like a mix between blackberries and raspberries, with a rich, juicy flavor that makes them ideal for jams, pies, and cobblers.
Can I make Olallieberry Jam without pectin?
Yes, you can make jam without pectin, but it will take longer to cook down, and the consistency may be softer. Pectin helps the jam set more quickly and ensures a firmer, glossy texture. If going pectin-free, use slightly underripe berries since they contain more natural pectin.
How long does homemade Olallieberry Jam last?
Sealed jars stored in a cool, dark pantry will last up to 12 months. Once opened, the jam should be refrigerated and consumed within 2–3 weeks.
Can I use frozen olallieberries for this recipe?
Absolutely! Frozen olallieberries work just as well as fresh ones. Just thaw them slightly and drain any excess liquid before measuring and cooking.
Why do I need to add butter to jam?
The ½ teaspoon of butter helps reduce foaming while the jam cooks. This makes it easier to skim and gives the finished jam a smooth, glossy appearance.
How do I know if my jam has appropriately set?
A quick test is the “wrinkle test”: place a spoonful of hot jam on a chilled plate, let it sit for a minute, then push it gently with your finger. If it wrinkles and holds shape, your jam has set.
Can I reduce the sugar in this Olallieberry Jam Recipe?
This recipe uses sugar for both flavor and preservation. Reducing sugar may cause the jam not to set properly or spoil faster. If you want a lower-sugar option, use a low-sugar pectin designed specifically for reduced-sugar jams.
Conclusion
Mastering this Olallieberry Jam Recipe allows me to capture the essence of summer and enjoy it year-round. With just a few simple steps, crushing the berries, boiling with sugar and pectin, and sealing in jars, I can create a homemade jam that’s delicious and versatile.
Whether spread on morning toast, swirled into desserts, or gifted to family and friends, Olallieberry Jam is a treat that never disappoints. The secret lies in using ripe, juicy olallieberries and measuring carefully for the perfect consistency.
So, grab your berries, jars, and saucepan, and start your own jam-making tradition. Once you taste that first spoonful of glossy, sweet-tart Olallieberry, you’ll be hooked on life!

Sally Mckenney is a dedicated baking enthusiast and dessert lover who creates and shares delicious cake recipes and practical baking tips on Daily Bake Lab. Her passion for sweet treats inspires home bakers to explore new flavors and enjoy the art of baking.