Cava Pita Chips Recipe | Crispy & Homemade
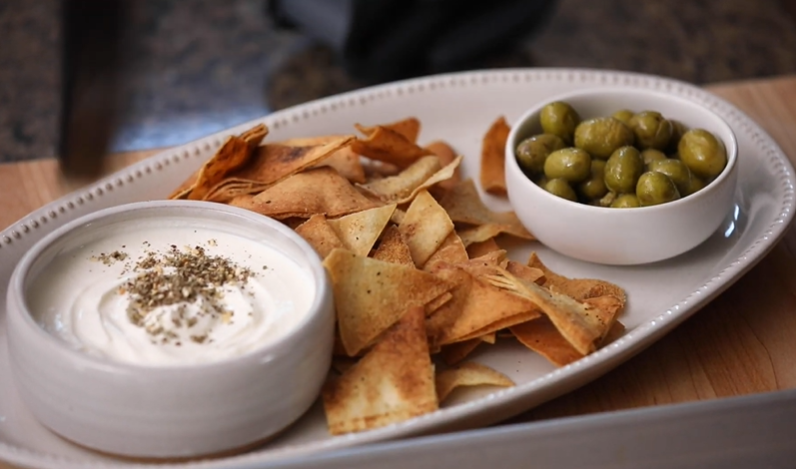
Craving a light, crunchy snack that pairs perfectly with dips like hummus or tzatziki? My homemade Cava Pita Chips Recipe is the ultimate Mediterranean-inspired treat. These chips are crispy, golden, and full of flavor, just like the ones you love from Cava, but made right in your own kitchen. With simple ingredients and quick prep, you’ll have a batch ready in under 20 minutes.
Whether you enjoy them as a party appetizer, a healthy afternoon snack, or as a crunchy topping for salads and bowls, these pita chips are versatile and delicious. The best part? You can season them however you like, from classic sea salt to smoky paprika, garlic powder, or even za’atar for an authentic Mediterranean twist.
Dough Preparation (Making the Pita Chips)
Even though we’re not working with a yeasted dough like in traditional bread recipes, preparing your pita chips the right way ensures maximum crispiness and flavor. Follow these steps to make your chips just like Cava’s.
Cutting and Prepping the Pita
- Preheat Oven: Start by preheating your oven to 375°F (190°C). This temperature gives you that golden crunch without burning the chips.
- Slice Pita Rounds: Using a sharp knife or pizza cutter, cut each pita round into triangles or strips, depending on your preference. You’ll typically get 8 triangles per round.
- Separate Layers (Optional): For extra-thin and crunchy chips, carefully split the pita pockets into single layers before cutting.
Seasoning and Coating
- Arrange on Baking Sheet: Spread the pita triangles evenly on a baking sheet lined with parchment paper.
- Drizzle or Brush with Olive Oil: Use a pastry brush to coat each piece lightly with olive oil for even crisping.
- Season Generously: Sprinkle with salt and pepper. For added flavor, dust with garlic powder, smoked paprika, or Mediterranean herbs like oregano or za’atar.
Baking the Pita Chips
Perfect Timing and Temperature
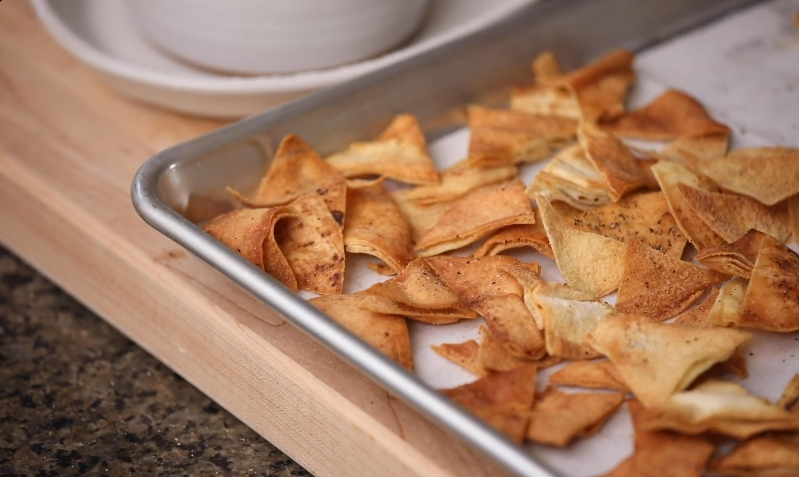
- Bake the pita chips for 10–15 minutes, flipping them halfway through to ensure both sides are evenly browned.
- Keep an eye on them during the last few minutes; pita chips can go from perfectly golden to burnt very quickly.
Cooling for Extra Crispiness
- Remove the tray from the oven and transfer the chips to a wire rack.
- Let them cool completely; they’ll crisp up even more as they rest.
Now, your homemade Cava-style pita chips are ready to be enjoyed!
Serving and Pairing Ideas
Homemade pita chips aren’t just a snack; they’re a Mediterranean snacking experience. Here are my favorite ways to enjoy them:
- With Dips: Pair your warm, crunchy pita chips with hummus, tzatziki, baba ganoush, or roasted red pepper dip.
- On Salads: Crush them lightly and sprinkle over Greek salads or grain bowls for a satisfying crunch.
- With Cheese & Charcuterie: Add them to a mezze platter alongside feta, olives, cured meats, and fresh veggies.
- Soup Companion: Use pita chips as a crispy sidekick for creamy soups like lentil, tomato basil, or butternut squash.
Flavor Variations
The beauty of this Cava-inspired pita chips recipe is how customizable it is. Try these seasoning variations for unique flavor twists:
- Garlic & Herb: Olive oil + garlic powder + dried oregano.
- Spicy Paprika: Olive oil + smoked paprika + cayenne pepper.
- Za’atar Pita Chips: Olive oil + za’atar spice blend for a bold Mediterranean taste.
- Parmesan Crunch: Olive oil + grated parmesan + black pepper, baked until lightly golden.
- Sweet Cinnamon Sugar: Brush with melted butter, sprinkle with cinnamon sugar, and bake, a sweet snack option!
Suggested Toppings
Want to take your pita chips to the next level? Top them before baking:
- Sprinkle sesame seeds or nigella seeds for extra crunch.
- Add a drizzle of tahini right before serving.
- Melt shredded cheese over the chips for a “Mediterranean nachos” vibe.
Storage Instructions
Keeping Pita Chips Fresh
To maintain that perfect crunch, store your cooled pita chips in an airtight container at room temperature. They’ll stay fresh and crispy for up to 5 days. Avoid sealing them while still warm, as trapped steam will soften them.
Freezing Option
If you want to make a bigger batch, you can freeze pita chips. Let them cool, then place them in a freezer-safe bag. Reheat in the oven at 350°F (175°C) for 5–7 minutes to revive the crispiness.
Cava Pita Chips Recipe
Ingredients
Video
Notes
Required Kitchen Tools
When making pita chips at home, having the right tools helps keep things simple and efficient:- Sharp Knife or Pizza Cutter – For slicing pita bread into neat triangles.
- Baking Sheet – A flat baking tray to spread out the pita pieces evenly.
- Parchment Paper – Helps prevent sticking and makes cleanup easy.
- Pastry Brush – Perfect for brushing olive oil evenly on each pita triangle.
- Mixing Bowl – To toss pita triangles with oil and seasonings if you prefer.
Frequently Asked Questions (FAQ)
Can I use whole wheat pita bread for pita chips?
Yes! Whole wheat pita bread works wonderfully for this recipe. It gives the chips a nuttier flavor and adds extra fiber, making them a healthier option.
How do I make pita chips in the air fryer instead of the oven?
To air fry, preheat your air fryer to 350°F (175°C). Place seasoned pita triangles in a single layer and cook for 5–7 minutes, shaking halfway through, until golden and crispy.
Why did my pita chips turn out chewy instead of crispy?
This usually happens if the chips were not baked long enough or if they were stored before cooling completely. Always let them cool fully on a wire rack, so they crisp up.
What spices taste best on pita chips?
Classic choices include garlic powder, paprika, za’atar, and dried oregano. For something bold, try smoked paprika and cayenne for a spicy kick, or cinnamon sugar for a sweet version.
Can I make pita chips ahead of time for a party?
Absolutely! Bake them a day ahead and store them in an airtight container. Before serving, you can pop them in the oven for 2–3 minutes at 350°F to refresh their crunch.
Are homemade pita chips healthier than store-bought?
Yes, since you control the oil and seasonings, homemade pita chips are typically lower in sodium and free from preservatives. They’re a lighter, fresher snack option.
Conclusion
Making Cava-style pita chips at home is quick, easy, and incredibly rewarding. With just a few simple ingredients, you can recreate that restaurant-quality crunch right in your own kitchen. Whether you enjoy them as a healthy snack, a party appetizer, or a crunchy salad topper, these chips are versatile and customizable to your taste.
From classic salted pita chips to flavorful variations like garlic herb, za’atar, or spicy paprika, the possibilities are endless. Plus, with proper storage, you can enjoy a fresh batch all week long.
So, grab your pita bread, preheat that oven, and let’s bring the Mediterranean flavor home. Once you try these homemade pita chips, you’ll never go back to store-bought again.

Sally Mckenney is a dedicated baking enthusiast and dessert lover who creates and shares delicious cake recipes and practical baking tips on Daily Bake Lab. Her passion for sweet treats inspires home bakers to explore new flavors and enjoy the art of baking.