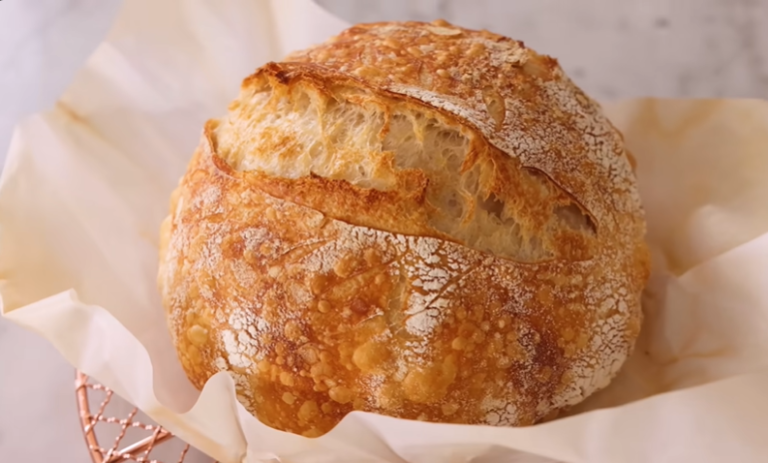
Crusty Italian Bread Recipe | Rustic & Homemade
Craving the comforting aroma of freshly baked bread? My Crusty Italian Bread Recipe is the perfect way to bring that warm, rustic Italian bakery feel right into your kitchen. With its golden, crisp crust and soft, flavorful interior, this bread pairs beautifully with pasta, soups, or is simply dipped in olive oil and balsamic vinegar. Trust me, once you bake this, your home will smell heavenly, and your family will keep coming back for more.
Dough Preparation
Making the dough is where the magic begins. Don’t worry, it’s easier than you think, and I’ll walk you through it step by step.
Mixing the Ingredients
Start by combining the lukewarm water, brown sugar, and yeast in the bowl of your stand mixer. Let it sit for about 5 minutes until the yeast becomes foamy; this means it’s alive and ready to work.
Next, add the olive oil, salt, Italian seasoning, and 3 cups of flour. Using the dough hook attachment on your mixer, knead the dough until it comes together into a soft ball. If the dough feels too sticky, gradually add more flour (about ½ cup at a time) until the dough pulls away from the sides of the bowl but still feels slightly tacky to the touch.
Kneading and First Rise
Once your dough is formed, continue kneading for about 5–6 minutes with the stand mixer, or 8–10 minutes by hand. The dough should be smooth and elastic when ready.
Place the dough in a lightly greased bowl, cover it with a damp kitchen towel, and let it rise in a warm, draft-free place for about 30 minutes, or until doubled in size. One of my favorite tricks is to let it rise inside the oven with the light turned on (but the oven itself turned off). The gentle warmth creates the perfect environment for proofing.
Shaping the Loaves
Once the dough has doubled in size, gently punch it down to release the air. Transfer it to a lightly floured surface and divide it into two equal portions.
- Shape into loaves: Roll each portion into an oval or baguette-style loaf. Place them on a parchment-lined baking sheet.
- Score the tops: Using a sharp knife or bread lame, make a lengthwise slit across each loaf. This allows the bread to expand properly while baking and gives it that rustic artisan look.
Second Rise
Cover the shaped loaves with a clean kitchen towel and let them rise again for about 30 minutes. This second proofing helps the bread develop that airy, fluffy interior we all love.
Baking the Bread
Here’s where the loaves transform into golden, crusty perfection.
- Prepare for steam: Place a shallow oven-safe dish filled with water on the lowest oven rack. This creates steam, which is the secret to achieving that irresistibly crunchy crust.
- Apply the egg wash: Brush the tops of the loaves with the beaten egg mixture (1 egg + 1 tablespoon water). This gives the bread a beautiful golden finish.
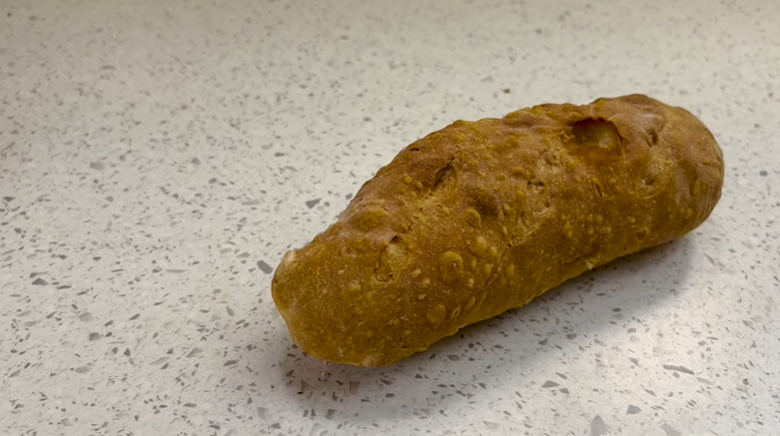
- Bake: Preheat your oven to 350°F (175°C). Bake the loaves for about 30 minutes, or until the crust is golden brown and the bread sounds hollow when tapped on the bottom.
Allow the loaves to cool on a wire rack before slicing. This helps the interior finish setting and keeps the crust perfectly crisp.
Serving and Pairing Ideas
One of my favorite things about this crusty Italian bread is how versatile it is. You can serve it warm with a drizzle of olive oil and balsamic vinegar for dipping, or alongside a hearty bowl of pasta or soup. It also makes an amazing base for garlic bread, just slice it, brush it with butter and garlic, and pop it under the broiler. For breakfast, I love to toast a slice and top it with butter and jam. Simple, rustic, and oh-so-delicious.
Storage Instructions
Keeping It Fresh
Store your loaves in a paper bag or wrap them in a clean kitchen towel to help maintain that crisp crust. Avoid sealing them in plastic, as that will soften the crust. The bread stays fresh at room temperature for up to 2 days.
Freezing the Bread
If you’d like to keep it longer, you can freeze the loaves. Wrap them tightly in plastic wrap and then foil, or place them in a freezer bag. They’ll keep well for up to 2 months. To reheat, simply thaw at room temperature and warm in the oven at 300°F for about 10 minutes.
Crusty Italian Bread Recipe
Ingredients
Video
Notes
Required Kitchen Tools
When making crusty Italian bread at home, having the right tools can make the baking process so much smoother and enjoyable. Here’s what I personally use every time:- Stand Mixer with Dough Hook – Helps knead the dough until it’s perfectly elastic.
- Large Mixing Bowl – Essential for mixing and proofing the dough.
- Parchment-Lined Baking Sheet – Prevents sticking and ensures even baking.
- Sharp Knife or Bread Lame – For scoring the top of the loaves before baking.
- Pastry Brush – To apply the egg wash for that golden-brown finish.
- Shallow Oven-Safe Dish – To hold water in the oven for steam, which creates that perfect crispy crust.
Frequently Asked Questions (FAQ)
Why is my Italian bread not crusty?
The secret to a crispy crust is steam during baking. Make sure to place a shallow dish of water in the oven while baking. Also, avoid wrapping the bread in plastic once cooled, as that will soften the crust.
Can I use bread flour instead of all-purpose flour?
Yes! Bread flour will give you a slightly chewier texture and stronger structure because it has a higher protein content. If you prefer a softer interior, stick with all-purpose flour.
How do I know when the bread is fully baked?
The bread should be a deep golden brown, and if you tap the bottom of the loaf, it should sound hollow. You can also use a kitchen thermometer; the internal temperature should be around 190–200°F (88–93°C).
Can I add other flavors to this Italian bread?
Absolutely! Try adding roasted garlic, sun-dried tomatoes, or shredded Parmesan cheese to the dough for extra flavor. You can also sprinkle sesame or poppy seeds on top before baking.
How long does homemade Italian bread stay fresh?
This bread is best enjoyed within 2 days at room temperature. If you want to keep it longer, freeze it instead of refrigerating it (as the fridge tends to dry it out).
Can I make this bread without a stand mixer?
Yes, you can knead the dough by hand. It may take a little more time (about 8–10 minutes of kneading), but the results will be just as delicious.
Conclusion
And there you have it, my homemade Crusty Italian Bread Recipe! With a crispy golden crust and a soft, chewy inside, this bread is the perfect addition to any meal. It’s surprisingly simple to make, and once you get the hang of it, you’ll want to bake it again and again.
Whether you’re serving it with a family dinner, making sandwiches, or just enjoying it fresh from the oven with a smear of butter, this rustic bread will make every bite feel like you’re sitting at an Italian table.
So grab your ingredients, preheat your oven, and get ready to fill your home with the irresistible aroma of freshly baked bread. Buon appetito!

Sally Mckenney is a dedicated baking enthusiast and dessert lover who creates and shares delicious cake recipes and practical baking tips on Daily Bake Lab. Her passion for sweet treats inspires home bakers to explore new flavors and enjoy the art of baking.