Ballerina Farm Sourdough Recipe | Rustic & Homemade
Craving Homemade Rustic Bread?
If you’ve ever dreamed of baking bread that tastes straight from the countryside, this Ballerina Farm-inspired sourdough recipe will bring that dream to life.
I’ve always admired how simple ingredients, flour, water, salt, and starter, can transform into something so rich in flavor and texture. Baking sourdough is more than just making bread; it’s a ritual of patience, care, and connection to tradition.
Unlike quick breads, sourdough requires time to ferment and develop its signature tangy taste. But trust me, once you pull a crackling golden loaf from the oven, the wait will be worth it. Let’s get started!
Dough Preparation
Making sourdough is all about rhythm and patience. I always remind myself that sourdough doesn’t like to be rushed; the flavors and textures come alive only when given time.
Mixing the Ingredients
- In a large mixing bowl, I combine 250 g of active starter with 735 g of water. I stir until the starter dissolves into the water.
- Next, I add the 1000 g of all-purpose flour and mix until all the flour is absorbed. The dough will be shaggy at this stage, and that’s perfectly fine.
- I cover the bowl with a towel and let the dough rest for 30 minutes (this stage is called autolyse and helps the gluten begin to develop).
Incorporating Salt and Water
After the rest, I sprinkle in 24 g of sea salt and add the remaining 50 g of water. With wet hands, I fold the salt and water into the dough until thoroughly combined.
Kneading & Stretch-and-Fold
Instead of traditional kneading, I use the stretch-and-fold method, which builds strength in the dough without overworking it.
- With damp hands, I grab one side of the dough, stretch it up, and fold it over the center.
- I turn the bowl a quarter turn and repeat the process until I’ve stretched and folded all four sides.
- After each set, I cover the bowl and let the dough rest for 30 minutes.
I repeat this 4–5 times over 2–3 hours. Each time, the dough feels smoother, firmer, and more elastic. Watching it transform is honestly one of my favorite parts of the process.
Shaping the Sourdough
Once the dough has finished its bulk fermentation and nearly doubled in size, it’s time to shape. This is where we prepare it for the final rise and create surface tension for that beautiful oven spring.
- I gently transfer the dough onto a lightly floured counter.
- Using a bench scraper, I divide the dough into two halves.
- To shape, I fold each half into a rough square, then tuck and roll it tightly into a ball.
- I stretch the surface slightly by pulling the dough toward me on the counter, which creates a taut top.
Proofing the Loaves
Proofing is the final rise, where the dough develops more flavor and structure:
- I place each shaped loaf into a floured banneton basket (or a bowl lined with a floured towel).
- I cover the baskets with plastic wrap or a towel, then let them rest at room temperature for 30 minutes.
- Afterward, I refrigerate the dough for at least 2 hours (you can even leave it overnight). This cold proofing makes the dough easier to score and enhances the sour flavor.
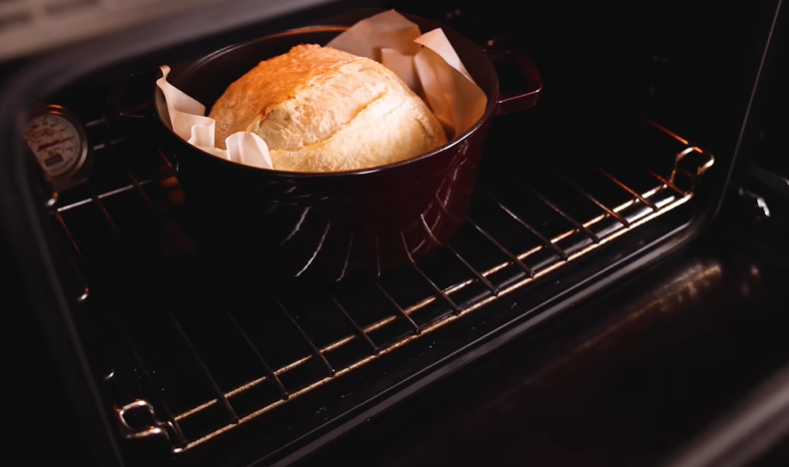
Baking the Sourdough
Baking sourdough is where all the magic happens. For the perfect crust and rise, I use a Dutch oven:
- I preheat the oven to 450°F (232°C) with the Dutch oven inside.
- Once hot, I carefully place one loaf into the pot, seam side down.
- Using a sharp blade or lame, I score the top of the dough (this controls the rise and creates that artisan look).
- I cover the pot and bake for 30 minutes.
- Finally, I remove the lid and bake for another 10–15 minutes to achieve a deep golden crust.
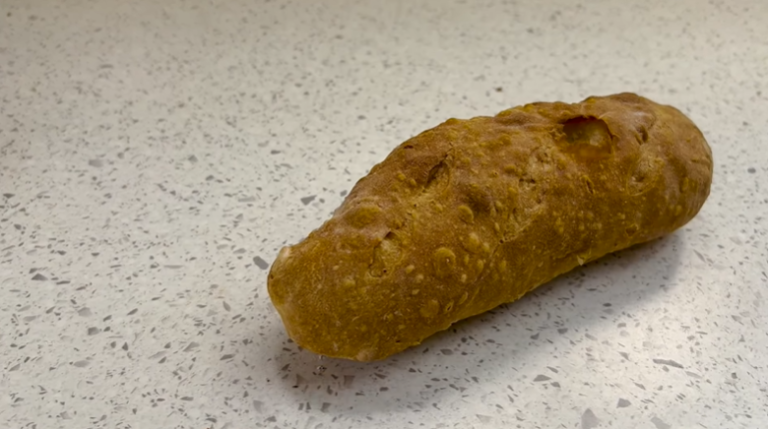
The moment I lift the lid and see the loaf burst open with those signature sourdough ears, I know it was worth every step.
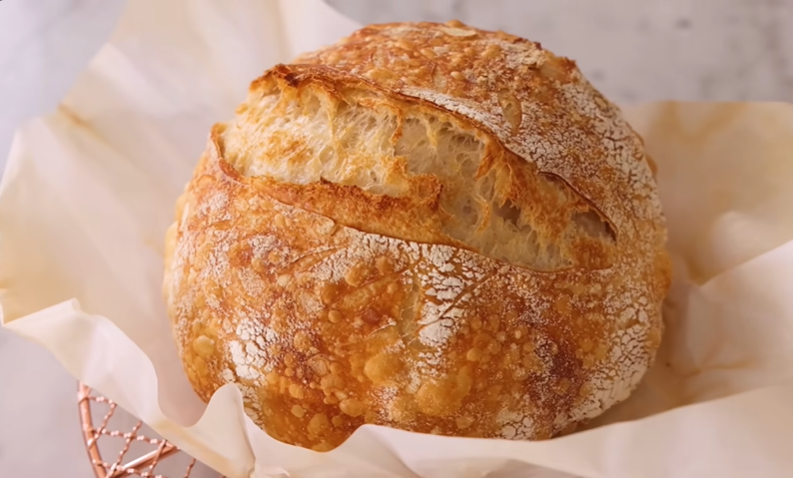
Serving Suggestions
One of the joys of sourdough is how versatile it is. When I pull a fresh loaf from the oven, I usually let it cool completely (even though the temptation to slice in early is strong). This helps the crumb appropriately set.
Here are some of my favorite ways to enjoy it:
- Spread with farm-fresh butter and honey for a rustic breakfast.
- Pair with hearty soups or stews, the chewy crust is perfect for dipping.
- Use it for gourmet sandwiches with roasted vegetables, cheese, or meats.
- Toast slices with olive oil and garlic for a quick bruschetta.
Storage Instructions
Keeping Bread Fresh
- Once cooled, I store my sourdough in a linen bag or wrapped in a clean kitchen towel. This keeps the crust crisp while preventing it from drying out too quickly.
- It stays fresh at room temperature for about 2–3 days.
Freezing Instructions
- To keep sourdough longer, I slice the loaf and place the slices in a freezer-safe bag.
- They keep beautifully for up to 1 month.
- When I’m ready to enjoy, I pop a slice straight into the toaster for fresh-tasting bread anytime.
Ballerina Farm Sourdough Recipe
Ingredients
Video
Notes
Required Kitchen Tools
When baking sourdough, the right tools make the process smoother and the results more consistent:- Mixing Bowl: A large bowl to combine your dough ingredients.
- Bench Scraper: Helps with folding and dividing dough without sticking.
- Kitchen Scale: Precision matters; measure in grams for best results.
- Dutch Oven or Cast-Iron Pot: Essential for getting that golden, crusty exterior.
- Banneton Baskets or Bowls: To proof and hold the dough’s shape.
- Clean Kitchen Towels/Plastic Wrap: For covering and resting the dough.
- Sharp Blade or Lame: To score the top of the loaves before baking.
Frequently Asked Questions (FAQ)
What makes Ballerina Farm sourdough special?
Ballerina Farm sourdough stands out because it focuses on simplicity and natural fermentation. With just four ingredients, flour, water, salt, and starter, you get a wholesome loaf that’s rustic, tangy, and inspired by farm-style living.
How long does sourdough take to rise?
It depends on the temperature of your kitchen and the strength of your starter. On average, the dough takes 4–6 hours during bulk fermentation and an additional 2–12 hours during the final proofing stage. Patience is key!
Can I use bread flour instead of all-purpose flour?
Yes, absolutely! Bread flour will give you a chewier texture and stronger gluten development, while all-purpose flour creates a softer crumb. Both work beautifully.
Why is my sourdough bread dense?
Dense bread often means the dough wasn’t fermented long enough, the starter wasn’t active, or the gluten structure wasn’t developed properly. Make sure your starter is bubbly and healthy before baking, and don’t rush the stretch-and-fold process.
Do I need a Dutch oven to bake sourdough?
While a Dutch oven gives the best results by trapping steam, you can also bake sourdough on a baking stone with a pan of water placed in the oven to create steam.
How do I know when sourdough is done baking?
A fully baked sourdough loaf will sound hollow when tapped on the bottom and have an internal temperature of around 205–210°F (96–99°C).
Can I make this recipe with whole wheat flour?
Yes! You can substitute up to 25–30% of the all-purpose flour with whole wheat flour for extra nutrition and a nuttier flavor. Just note that entire wheat absorbs more water, so you may need to increase hydration slightly
Conclusion
Baking this Ballerina Farm Sourdough Recipe is more than just making bread; it’s a rhythm, a tradition, and a little bit of patience rewarded with something extraordinary. With a bubbly starter, good flour, and time, you can turn four simple ingredients into a crusty, tangy, and wholesome loaf that feels like it came straight from a farmhouse kitchen.
Every bake is a new story: some loaves will have dramatic ears, others a soft golden crust, but all of them carry that comforting, homestead feel. So grab your starter, set aside some time, and let your kitchen smell like freshly baked sourdough. Trust me, once you start baking, it’ll become a beloved ritual in your home.

Sally Mckenney is a dedicated baking enthusiast and dessert lover who creates and shares delicious cake recipes and practical baking tips on Daily Bake Lab. Her passion for sweet treats inspires home bakers to explore new flavors and enjoy the art of baking.