Mayhaw Jelly Recipe | Sweet, Tangy & Homemade Delight
Making Mayhaw Jelly from scratch is one of my favorite Southern traditions. Bursting with natural sweetness and a hint of tartness, mayhaw berries create a jelly that’s perfect for spreading on toast, biscuits, or even pairing with cheeses and desserts. The process is simple: extract the juice from ripe berries, combine with sugar and pectin, and boil to a smooth, vibrant jelly. Not only is it delicious, but homemade Mayhaw Jelly also captures the authentic taste of fresh, seasonal berries in every jar.
Whether you’re preserving for yourself or gifting to loved ones, this recipe guarantees a flavorful, set jelly that will impress anyone who tries it.
Juice Preparation and Extraction
Making the juice from fresh mayhaw berries is the most crucial step for a smooth and flavorful jelly. I always make sure to handle the berries gently to preserve their natural sweetness and color.
Step 1: Wash the Berries
First, I thoroughly wash all the mayhaw berries under cold running water. This removes any dirt, debris, or small stems and ensures that the jelly will be clean and pure.
Step 2: Boil the Berries
I take a large pot and add the washed berries. Then I pour in enough water to cover the berries by a few centimeters. I bring the water to a gentle boil and let the berries cook until they become tender, releasing their juice naturally.
Step 3: Strain the Juice
Once the berries are soft, I pour the mixture through a strainer or colander to separate the seeds and pulp from the liquid. To get a crystal-clear juice, I pass it again through a fine mesh strainer, making sure all solids are removed.
Step 4: Optional Coloring
If I want my Mayhaw Jelly to have a brighter red hue, I add a few drops of red food coloring to the juice and stir gently. This step is purely optional, but it gives a visually appealing finish.
Jelly Cooking and Setting Process
Now that I have my clear mayhaw juice ready, it’s time to transform it into that perfectly set, sweet jelly we all love.
Step 1: Combine Juice and Pectin
In a 7-quart saucepan, I pour in 4 cups of the cleared mayhaw juice and sprinkle in the pectin. I stir it well to make sure the pectin dissolves completely, which helps the jelly set properly.
Step 2: Reduce Foam with Butter
To minimize foam while boiling, I add 1 teaspoon of butter to the juice. This simple trick keeps the jelly smooth and clear.
Step 3: Boil the Jelly
I turn the stove to high heat and bring the mixture to a rolling boil, stirring constantly. Once boiling, I gradually add all 5 cups of sugar while continuing to stir. I let it boil at high flame precisely for 60 seconds, ensuring the sugar fully integrates with the juice.
Step 4: Remove Foam and Jar the Jelly
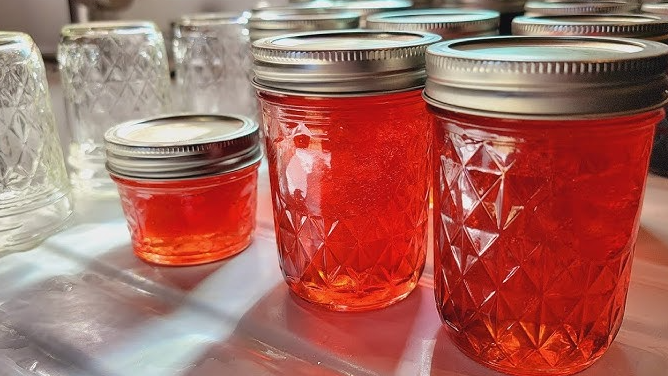
After boiling, I carefully remove any foam that has formed on top. Then, while the jelly is still hot, I immediately pour it into clean, sterilized jars and tightly close the lids. This prevents the jelly from hardening in the pan and ensures it’s ready for preservation.
Step 5: Water-Bath Canning
To make the jelly shelf-stable, I place all the jars in a stockpot and add boiling water until it reaches about 2 inches above the jars. I cover the stockpot and let the jars gently boil on low flame for 5 minutes. After processing, I carefully remove the jars and allow them to cool. Once cooled, I check the seals to make sure the jelly has been processed correctly.
Serving, Storage, and Tips for the Perfect Mayhaw Jelly
Making Mayhaw Jelly is rewarding, and enjoying it the right way makes it even better. Here’s how I serve, store, and get the best results every time.
Serving Suggestions
I love spreading Mayhaw Jelly on warm toast, biscuits, or scones for a sweet and tangy treat. It also works beautifully as a glaze for desserts, a topping for yogurt, or even paired with cheeses on a charcuterie board. If I’m feeling creative, I sometimes swirl it into homemade ice cream for a fruity twist.
Storage Instructions
At Room Temperature: Once sealed and processed correctly, the jelly can be stored in a cool, dark place for up to a year. I always keep it away from direct sunlight to maintain its vibrant color and flavor.
After Opening: After opening, I refrigerate the jelly. It stays fresh for up to 3 weeks when kept in an airtight container.
Freezing: If I want to store extra jelly, I pour it into freezer-safe jars or containers, leaving some space at the top for expansion. It can be frozen for up to 6 months and thawed in the fridge when needed.
Tips for Perfect Mayhaw Jelly
- Use Fully Ripe Berries: They provide the best flavor and natural pectin.
- Strain Thoroughly: Clear juice makes a smooth, attractive jelly.
- Don’t Skimp on Sugar or Boiling Time: This ensures proper set and shelf stability.
- Add Butter: Even a small amount helps reduce foam for a cleaner finish.
- Optional Food Coloring: Enhances visual appeal but is not necessary for flavor.
Making Mayhaw Jelly from scratch is a delightful experience. From gathering ripe berries to tasting the final sweet, tangy spread, each step is rewarding. By following these instructions, I’m always able to enjoy a homemade jelly that’s vibrant, smooth, and packed with the natural goodness of mayhaw berries.
Mayhaw Jelly Recipe
Ingredients
Video
Notes
Required Kitchen Tools
Making Mayhaw Jelly is much easier with the right tools on hand. Here’s what I always use:- Large Pot: For boiling the berries and extracting the juice.
- Strainer or Colander: To separate seeds and pulp from the juice.
- Fine Mesh Strainer: Ensures the juice is clear and smooth.
- 7-Quart Saucepan: Perfect for cooking the jelly without overflow.
- Wooden Spoon: For stirring the jelly mixture consistently.
- Jars with Lids: For storing the jelly after processing.
- Stockpot: For water-bath canning to preserve the jelly.
Frequently Asked Questions (FAQ)
What are mayhaw berries?
Mayhaw berries are small, red, tart berries native to the Southern United States. They are commonly used in jellies, jams, and syrups.
Can I use frozen mayhaw berries for this recipe?
Yes, frozen berries can be used, but fresh berries give the best flavor and natural pectin for proper setting.
Why is butter added to the jelly?
Adding a small amount of butter helps reduce foam during boiling, giving the jelly a clearer, smoother appearance.
How long does Mayhaw Jelly last?
Sealed jars can last up to a year in a cool, dark place. After opening, refrigerate for up to 3 weeks. Jelly can also be frozen for up to 6 months.
Can I skip food coloring?
Absolutely. Food coloring is optional and only used to enhance the red color. The natural juice will still make a beautiful jelly.
Conclusion
Mastering homemade Mayhaw Jelly is incredibly rewarding. From picking and boiling the berries to jarring and water-bath processing, each step allows you to experience the natural flavors of this unique Southern fruit. With its smooth texture, bright color, and balanced sweetness, Mayhaw Jelly is perfect for daily use or special occasions. By following this recipe carefully and storing it properly, you can enjoy a fresh, tangy jelly all year round. Homemade jelly not only tastes better than store-bought, but it also offers the satisfaction of creating something truly from scratch.

Sally Mckenney is a dedicated baking enthusiast and dessert lover who creates and shares delicious cake recipes and practical baking tips on Daily Bake Lab. Her passion for sweet treats inspires home bakers to explore new flavors and enjoy the art of baking.