Copycat Zantigo Chilito Recipe | Cheesy Chili Burrito
Craving that nostalgic taste of the famous Zantigo Chilito? This cheesy, meaty, and perfectly spiced chili burrito is a Midwest fast-food legend. With simple ingredients and easy steps, you can recreate this comforting dish right in your own kitchen. Whether you remember grabbing one back in the day or are trying it for the first time, this homemade Zantigo Chilito recipe is bound to satisfy.
Chili Preparation
Making the chili filling is the heart of this Zantigo Chilito recipe. This step is where all the bold, comforting flavors come together.
Step 1: Browning the Beef
I start by heating a large skillet over medium–high heat. Add the ground beef and cook until it’s browned evenly, breaking it apart with a wooden spoon as it cooks. Once the beef is fully browned, I carefully drain off any excess fat to keep the chili from becoming greasy.
Step 2: Building Flavor with Onion & Garlic
Next, I add the chopped onion and minced garlic right into the skillet with the beef. I cook them for about 3–4 minutes until the onion turns soft and translucent. This step makes the whole kitchen smell incredible and adds depth to the chili.
Step 3: Adding Tomatoes and Sauce
Now it’s time to pour in the diced tomatoes and tomato sauce. The combination gives the chili a rich, tangy base that balances beautifully with the spices.
Step 4: Seasoning the Chili
To really capture that Zantigo flavor, I stir in:
- Chili powder (for warmth and smokiness)
- Cumin (for earthy depth)
- Paprika (for mild spice and color)
- Salt & black pepper (to balance everything out)
I give it all a good stir so the beef and vegetables soak up the seasonings.
Step 5: Adding the Beans
Finally, I mix in the kidney beans. They make the filling heartier and help stretch the chili, just like in the original Chilito.
Simmering the Chili
After combining all the ingredients, I bring the mixture to a gentle boil over medium heat. Once it starts bubbling, I reduce the heat and let it simmer for 10–15 minutes, stirring occasionally. This allows all the flavors to meld together, and the chili thickens slightly, creating that signature Zantigo Chilito texture.
While the chili simmers, it’s the perfect time to prepare the tortillas.
Warming the Tortillas
To make rolling easier and prevent tearing, I warm the flour tortillas. You can do this in the microwave for about 15–20 seconds or in a preheated oven at 350°F (175°C) for 3–5 minutes. Warm tortillas are soft, flexible, and perfect for holding all that delicious chili filling.
Assembling the Chilitos
Once the chili is ready and the tortillas are warm, I start assembling the burritos:
- Lay a tortilla flat on a clean surface.
- Spoon a generous portion of the beef and chili mixture onto the center.
- Sprinkle shredded cheese over the chili while it’s still hot so it melts slightly.
- Fold in the sides and roll the tortilla tightly to form a neat burrito.
I repeat this process for all 8 tortillas, making sure each Chilito is packed with that perfect balance of beef, beans, and spice.
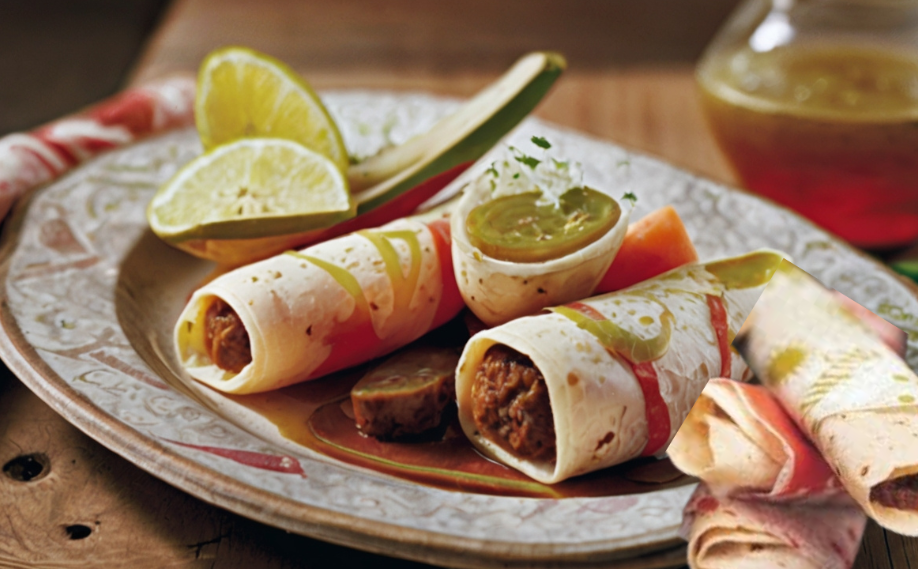
Serving and Toppings
Nothing beats a freshly made Zantigo Chilito! I like to serve these burritos warm, right off the skillet or oven. For added flavor and presentation, here are some of my favorite ways to enjoy them:
- Lettuce: A handful of shredded lettuce adds a crisp, fresh contrast to the rich chili.
- Extra Cheese: Sprinkle a little more cheddar or Mexican blend on top for gooey indulgence.
- Diced Tomatoes: Fresh tomatoes add a juicy burst and balance the spices.
- Sour Cream or Salsa: Optional, but a dollop of sour cream or mild salsa elevates the flavor.
These toppings make the Chilitos feel extra special and customizable for every taste preference.
Storage Instructions
Keeping Chilitos Fresh
If you have leftovers, I store them in an airtight container in the refrigerator for up to 3 days. They stay flavorful, though I recommend reheating gently to prevent drying out.
Freezing for Later
To keep them longer, I wrap each Chilito individually in foil or plastic wrap and place them in a freezer-safe bag. They can last up to 1 month in the freezer. Reheat in the oven at 350°F (175°C) for 10–15 minutes for best results.
Zantigo Chilito Recipe
Ingredients
Video
Notes
Required Kitchen Tools
To make the perfect homemade Zantigo Chilito, here are the tools I use:- Large skillet or pot – For browning the beef and simmering the chili mixture.
- Wooden spoon – Ideal for stirring and breaking up the beef as it cooks.
- Measuring cups & spoons – To keep spice levels just right.
- Simmer pot lid – Helps the chili cook evenly.
- Microwave or oven – For warming the tortillas before assembly.
FAQ – Zantigo Chilito Recipe
Can I make Zantigo Chilito vegetarian?
Absolutely! Replace the ground beef with plant-based meat crumbles, lentils, or extra kidney beans. You can keep the same spices and tomato base for that classic Chilito flavor.
What cheese works best for Zantigo Chilitos?
I recommend cheddar cheese or a Mexican blend. They melt beautifully and complement the chili filling perfectly. For extra richness, you can also add Monterey Jack.
Can I make this recipe ahead of time?
Yes! You can prepare the chili filling a day in advance and refrigerate it. Warm it up when ready to assemble the Chilitos. The tortillas should be warmed just before rolling.
Can I freeze Zantigo Chilitos?
Definitely, wrap each burrito individually in foil or plastic wrap and store in a freezer-safe bag. They last up to 1 month. Reheat in the oven at 350°F (175°C) for 10–15 minutes for the best results.
How spicy is this recipe?
This recipe is mild to medium in spice, depending on your chili powder. You can adjust the chili powder or add a pinch of cayenne pepper for extra heat.
Can I use corn tortillas instead of flour tortillas?
While flour tortillas are traditional for Zantigo Chilitos, corn tortillas can work, but they are less flexible and may tear during rolling. I recommend warming them carefully to make them more pliable.
Can I add extra toppings?
Yes! Lettuce, diced tomatoes, shredded cheese, sour cream, or salsa all make great toppings. Customize your Chilitos to suit your taste preferences.
Conclusion
Making a Zantigo Chilito at home is easier than you might think, and it’s a fun way to bring a nostalgic fast-food favorite into your kitchen. By following these steps, you get tender beef, perfectly seasoned chili, and soft, warm tortillas rolled into a delicious burrito every time.
Whether you’re cooking for your family or recreating a childhood memory, this recipe delivers flavor, comfort, and a touch of fast-food nostalgia. Roll, fill, and enjoy, your homemade Zantigo Chilitos are ready to impress!

Sally Mckenney is a dedicated baking enthusiast and dessert lover who creates and shares delicious cake recipes and practical baking tips on Daily Bake Lab. Her passion for sweet treats inspires home bakers to explore new flavors and enjoy the art of baking.