Brick Chili Recipe | Hearty & Bold Comfort Dish
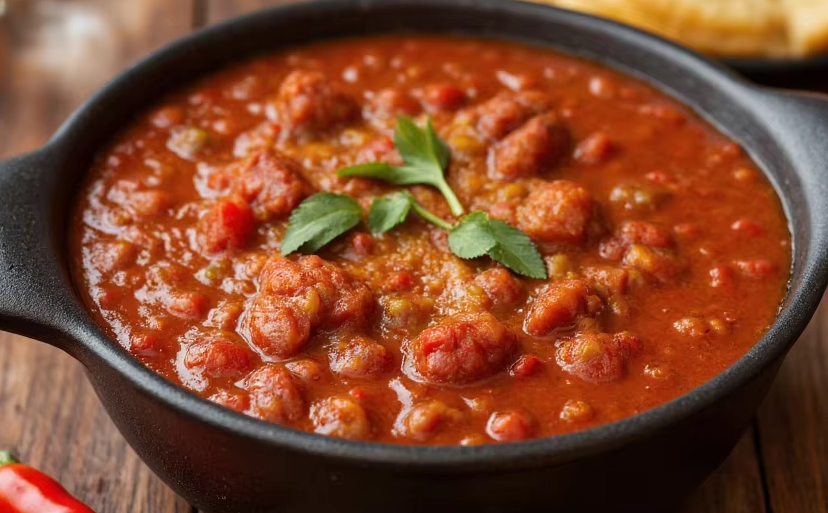
Craving a hearty, bold, and flavorful chili that stands the test of time? My Brick Chili Recipe is an authentic, old-school way of making chili that’s simmered, packed with spices, and stored in brick-like portions for lasting enjoyment. Unlike modern quick chilis, this recipe delivers a deep, rich flavor that gets even better as it rests.
Traditionally, brick chili was prepared in large batches, stored in rectangular pans, and refrigerated until firm, creating “bricks” of chili that could be sliced and reheated whenever hunger struck. This method not only preserves flavor but also makes meal prep incredibly easy.
Whether you’re planning for game day, family gatherings, or want a freezer-friendly chili that lasts for weeks, this Brick Chili Recipe is the ultimate comfort food
Preparing the Brick Chili
Cooking brick chili is all about building flavor slowly. By rendering the suet first, browning the meat thoroughly, and simmering the spices low and slow, you’ll create a chili with incredible depth.
Step 1 – Render the Suet
Place your large Dutch oven or heavy pot over medium heat. Add the ground suet and allow it to melt completely. This old-fashioned technique gives the chili a rich, authentic flavor and prevents the meat from drying out.
Step 2 – Sauté the Onions
Once the suet has melted, add the chopped onions and cook until they turn golden and fragrant. This layer of flavor will be the base of your chili.
Step 3 – Brown the Meat
Add the chili meat to the pot. Cook for 15–20 minutes, stirring occasionally, until the meat is browned and separated. Don’t rush this step, browning the meat to that deep, savory taste brick chili is famous for.
Step 4 – Add the Seasonings
Mix in the salt, black pepper, garlic powder, cumin powder, red pepper, and chopped chili peppers. Stir well so that the meat is evenly coated with spices.
Step 5 – Slow Simmer
Reduce the heat to low and let the chili simmer gently for 2 ½ to 3 hours. Keep the pot partially covered and stir occasionally to prevent sticking. This slow cooking allows the flavors to meld beautifully.
Step 6 – Final Touch with Chili Powder
About 15 minutes before the chili is done, stir in the chili powder. Adding it at the end keeps the flavor bold and fresh instead of mellowing out too much during the long simmer.
At this point, your kitchen should be filled with the rich, mouthwatering aroma of classic brick chili.
Shaping the Brick Chili
One of the unique features of this recipe is how it’s stored. Unlike regular chili that’s eaten right out of the pot, brick chili is poured into containers and allowed to set into firm, sliceable blocks.
Step 1 – Pour into Containers
Once the chili is cooked and still hot, carefully ladle it into rectangular baking dishes or loaf pans. Spread evenly so the chili sets into uniform layers.
Step 2 – Cool and Set
Let the chili cool to room temperature. Once cooled, transfer the pans to the refrigerator and allow the chili to firm up. Within a few hours, it will solidify into thick, brick-like portions.
Step 3 – Slice & Store
When thoroughly chilled, you can slice the chili into slabs or cubes. Wrap each piece tightly in foil or store in airtight containers. This makes it easy to grab a portion whenever you need a quick, hearty meal.
Serving Suggestions
Brick chili is versatile, bold, and pairs wonderfully with a variety of sides. Here are some of my favorite serving ideas:
- Classic Bowl: Reheat a brick portion in a saucepan or microwave, then serve hot in a bowl.
- With Cornbread: A slice of warm, buttery cornbread makes the perfect companion.
- Chili Dogs: Melt a brick portion and spoon it over hot dogs with cheese and onions.
- Over Rice or Potatoes: Serve chili over steamed rice or baked potatoes for a filling meal.
- Chili Mac: Stir into cooked pasta and top with shredded cheese for comfort food heaven.
Storage Instructions
One of the best things about this recipe is how well it keeps.
Refrigerator Storage
Stored in airtight containers or wrapped in foil, brick chili lasts up to 2 weeks in the fridge. The flavor deepens over time, making it even better after a day or two.
Freezer Storage
For more extended storage, wrap the bricks tightly in foil or plastic wrap, then place them in freezer-safe bags. Frozen brick chili keeps up to 3 months. To serve, thaw overnight in the fridge and reheat gently on the stove.
Tips for the Perfect Brick Chili
Making brick chili is simple, but a few tricks can elevate your recipe:
- Brown the meat thoroughly: I can’t stress this enough; well-browned beef adds a deep, savory flavor. Don’t rush it.
- Customize Your Spices: Start with the amounts listed, then adjust chili powder, red pepper, or cumin to match your preferred heat level.
- Low and Slow is Key: Simmering over low heat for hours develops the bold, rich flavor brick chili is known for.
- Use Fresh Chili Peppers: Parboiled and skinned peppers add authentic depth. You can also experiment with smoked or dried varieties.
- Let it Rest: The chili tastes even better after sitting in the fridge for a few hours or overnight.
Brick Chili Recipe
Ingredients
Video
Notes
Required Kitchen Tools
When making traditional brick chili, having the right tools makes the process smooth and foolproof. Here are the essentials I recommend:- Heavy-Duty Dutch Oven or Large Stockpot – For slow cooking the chili evenly over low heat.
- Sharp Chef’s Knife – To chop onions and finely mince chili peppers.
- Wooden Spoon or Heatproof Spatula – To stir the chili as it simmers.
- Measuring Spoons – For precise spice additions.
- Rectangular Baking Dishes or Storage Containers – To pour and set the chili into brick-like portions.
- Airtight Lids or Foil Wraps – For storage in the fridge or freezer.
Brick Chili Recipe FAQs
What makes this chili a “brick” chili?
The name comes from the traditional method of pouring the cooked chili into rectangular pans and chilling it until firm. This creates solid, sliceable portions that resemble bricks, perfect for storage and reheating.
Can I use different types of meat?
Yes! While the original recipe uses lean chili meat, you can experiment with ground beef, chuck, or even a beef-pork mix. Just make sure to brown the meat well for the best flavor.
How spicy is this chili?
The recipe has a moderate heat thanks to the red pepper, chili peppers, and chili powder. You can adjust the spice level by adding more chili powder or using hotter chili varieties.
Can I freeze brick chili?
Absolutely. Brick chili freezes beautifully. Slice into portions, wrap tightly in foil or plastic wrap, and store in freezer-safe bags. It keeps up to 3 months.
How should I reheat brick chili?
Reheat on low heat in a saucepan or in the microwave. If needed, add a splash of water or broth to prevent dryness.
How long does brick chili last in the fridge?
When stored in airtight containers, it lasts up to 2 weeks. Flavors actually improve after sitting for a day or two.
Can I customize the spices?
Definitely! I recommend starting with the listed spices and then adjusting chili powder, cumin, or red pepper to match your taste.
Can I use canned chili peppers instead of fresh?
You can, but fresh or parboiled peppers give the best authentic flavor. If using canned, reduce added salt as canned peppers can be slightly salty.
Conclusion
My Brick Chili Recipe is a timeless classic that delivers bold, comforting flavors in every bite. With slow-slow-cooked meatfectly balanced spices, and the unique brick storage method, this chili is ideal for meal prep, gatherings, or anytime you crave a hearty, satisfying dish.
By following the steps above, you can enjoy a chili that’s rich, flavorful, and ready to serve for weeks. Whether you stick to tradition or tweak the spices to your taste, this recipe ensures a delicious, versatile chili experience every time.
So, gather your ingredients, prep your chili, and let the magic of slow cooking transform your kitchen into a haven of bold, savory flavors. Your taste buds, and your future self, will thank you…

Sally Mckenney is a dedicated baking enthusiast and dessert lover who creates and shares delicious cake recipes and practical baking tips on Daily Bake Lab. Her passion for sweet treats inspires home bakers to explore new flavors and enjoy the art of baking.