Salmonberry Jam Recipe | Sweet Wild Berry Spread
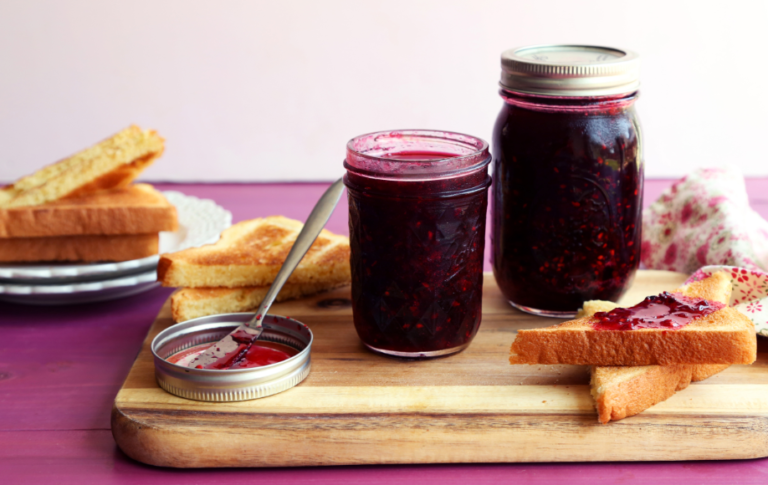
Craving something unique, wild, and delicious? Let me introduce you to homemade Salmonberry Jam, a sweet and tangy preserve made from the beautiful salmonberry, often found in coastal forests of the Pacific Northwest and Alaska. With their vibrant orange-red hue and delicate flavor, salmonberries transform into a jam that’s both nostalgic and truly one-of-a-kind.
Whether you spread it on warm toast, swirl it into yogurt, or gift it to friends, this jam recipe captures the essence of summer in every jar. The best part? It’s simple, quick, and perfect for anyone new to canning.
Jam Preparation
Making salmonberry jam is all about balancing sweetness and preserving that fresh, tangy berry flavor. Follow these steps carefully, and you’ll end up with a batch of jam that’s perfectly thick, flavorful, and shelf-stable.
Step 1: Sterilize Your Jars
Before you start cooking, wash and sterilize your canning jars, lids, and rings. I like to boil mine in hot water for at least 10 minutes to make sure everything is spotless and safe for preserving. Keep them warm until you’re ready to fill them.
Step 2: Prepare the Salmonberries
Wash the berries thoroughly, then crush them using a potato masher or the back of a spoon. If you prefer a smoother jam, you can strain out some of the seeds, but I usually leave most of them in for that authentic texture.
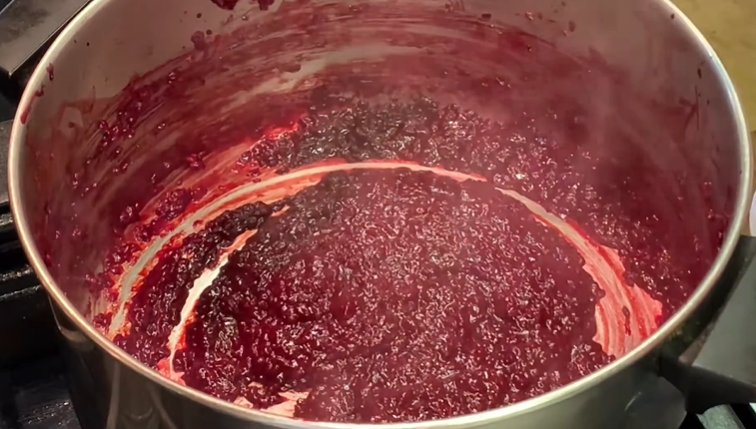
Step 3: Cook the Berries and Sugar
Place the crushed berries in a large pot. Add the sugar and stir continuously as you bring the mixture to a full rolling boil (a boil that doesn’t stop bubbling when stirred). This step helps dissolve the sugar and release the natural juices of the berries.
Step 4: Add Pectin and Boil Again
Once the mixture is boiling, stir in the powdered fruit pectin. Continue cooking for 1 full minute, stirring constantly to prevent sticking or burning. You’ll notice the jam start to thicken as the pectin activates.
Step 5: Remove Foam and Fill Jars
Skim off any foam that forms on top for a cleaner finish. Using a ladle and funnel, carefully fill each jar, leaving about ¼ inch of headspace at the top. Run a clean knife or spatula along the inside of the jar to release any trapped air bubbles.
Step 6: Seal and Process Jars
Wipe the rims of the jars with a damp paper towel to remove any stickiness, then secure the lids and rings. Place the jars into a large pot fitted with a canning rack, making sure they’re fully covered with boiling water. Boil for 5 minutes to properly seal.
Step 7: Cool and Store
Remove the jars and let them cool for 24 hours undisturbed. You should hear that satisfying pop sound as the lids seal tight. Store the sealed jars in a cool, dark place for up to one year. Once opened, refrigerate and use within 2–3 weeks.
Serving and Flavor Ideas
One of the best things about homemade salmonberry jam is how versatile it is. Its sweet-tart flavor pairs beautifully with both sweet and savory foods, making it more than just a spread for toast.
Serving Suggestions
- Classic Toast & Biscuits – Spread it generously on warm buttered toast, biscuits, or English muffins.
- Breakfast Boost – Swirl it into oatmeal, yogurt, or smoothies for a fruity kick.
- Cheese Pairing – Serve alongside soft cheeses like brie or goat cheese for an elegant appetizer.
- Dessert Topping – Drizzle it over cheesecake, ice cream, or sponge cake.
- Glaze for Meat – Brush it on roasted chicken, pork, or salmon for a tangy-sweet glaze.
Flavor Variations
Homemade jam gives you room to play with flavors. Here are a few twists I love:
- Citrus Brightness – Add 1 tablespoon of lemon juice or zest while cooking for a zesty lift.
- Warm Spices – A pinch of cinnamon, nutmeg, or cloves gives your jam a cozy depth.
- Mixed Berry Blend – Combine salmonberries with raspberries, blueberries, or blackberries for a richer flavor profile.
- Honey Sweetness – Replace part of the sugar with honey for a more natural, floral sweetness.
Experimenting with these variations ensures every batch has its own unique character while keeping that wild salmonberry essence intact.
Storage Instructions
How to Keep Salmonberry Jam Fresh
Once your jars have cooled and sealed correctly, you can store them in a cool, dark place, like a pantry, for up to 1 year. Always check the lids before opening to make sure the seal is intact.
After opening, keep your jam in the refrigerator. It stays fresh for 2–3 weeks, though in my house it never lasts that long!
Freezing Salmonberry Jam
If you prefer, you can also freeze salmonberry jam instead of canning it. Let the jam cool, pour it into freezer-safe containers, leaving some space for expansion, and freeze for up to 6 months. Thaw in the fridge before using.
Salmonberry Jam Recipe
Ingredients
Video
Notes
Required Kitchen Tools
Making Salmonberry Jam is much easier when you have the right tools. Here’s what I recommend:- Large Pot: For cooking the jam mixture evenly.
- Canning Jars with Lids & Rings: Clean and sterilize for safe storage.
- Canning Rack: To keep jars secure while boiling.
- Jar Lifter: For safely handling hot jars.
- Ladle & Funnel: To fill jars neatly without spills.
- Clean Kitchen Towels & Paper Towels: For wiping rims and handling jars.
Frequently Asked Questions (FAQ)
What do salmonberries taste like?
Salmonberries have a mildly sweet and tart flavor, similar to raspberries but less intense. They’re juicy and slightly tangy, making them perfect for jam.
Can I make salmonberry jam without pectin?
Yes! You can cook the berries with sugar and lemon juice for a longer time until the mixture naturally thickens. The texture may be softer, but it will still be delicious.
Do I need to remove the seeds from salmonberries?
Not necessarily. Some people prefer a seedless jam, but it’s optional. You can strain part of the pulp through a fine mesh sieve if you’d like a smoother texture.
How long does homemade salmonberry jam last?
Properly canned and sealed jam lasts up to 1 year in a cool, dark place. Once opened, refrigerate and use within 2–3 weeks.
Can I freeze salmonberry jam instead of canning it?
Yes! Just pour cooled jam into freezer-safe containers, leaving some headspace, and freeze for up to 6 months. Thaw in the fridge before use.
What can I use salmonberry jam for?
It’s incredibly versatile; spread it on toast, biscuits, or pancakes, swirl it into yogurt, pair it with cheese, drizzle it over desserts, or use it as a glaze for meat.
Can I mix salmonberries with other fruits?
Definitely! Salmonberries pair beautifully with raspberries, blueberries, or blackberries, adding depth and variety to your jam.
Conclusion
Making homemade salmonberry jam is one of my favorite ways to capture the taste of summer. From the moment those berries hit the pot to the satisfying “pop” of sealing jars, the process is both rewarding and delicious.
This jam is versatile, perfect for breakfast, desserts, or even savory pairings. By following this recipe, you can stock your pantry with jars of sweet, tangy goodness that last all year. Whether you stick with the classic version or add a personal twist with spices or citrus, your salmonberry jam will always be a hit.
So, grab those fresh salmonberries, roll up your sleeves, and let’s preserve a little sunshine in a jar.

Sally Mckenney is a dedicated baking enthusiast and dessert lover who creates and shares delicious cake recipes and practical baking tips on Daily Bake Lab. Her passion for sweet treats inspires home bakers to explore new flavors and enjoy the art of baking.